No products in the cart.

Introduction:
In this tutorial, we’ll guide you through the process of setting up Apache, PHP, phpMyAdmin, and Laravel on your Raspberry Pi. Additionally, we’ll show you how to connect your Raspberry Pi to Cloudflare Tunnel for secure access from anywhere.
Prerequisites:
- A Raspberry Pi with Raspbian OS installed.
- Basic knowledge of Linux commands.
- A Cloudflare account.
Step 1: Update and Install Apache
sudo apt update
sudo apt-get install apache2 -y
Step 2: Access Apache’s Default Page
Open a web browser and enter your Raspberry Pi’s hostname or IP address, e.g., http://raspberrypi.local. You should see the default Apache page if the installation was successful.
Step 3: Remove Default HTML Page
cd /var/www/html/
sudo rm index.html
cd /
Step 4: Install PHP 8.2
sudo wget -qO /etc/apt/trusted.gpg.d/php.gpg https://packages.sury.org/php/apt.gpg
echo "deb https://packages.sury.org/php/ $(lsb_release -sc) main" | sudo tee /etc/apt/sources.list.d/php.list
sudo apt update
sudo apt install -y php8.2-common php8.2-cli
php --version
Step 5: Install PHP Modules and MariaDB
sudo apt install -y php8.2-mysql
sudo apt install -y libapache2-mod-php8.2
sudo apt install mariadb-server php-mysql -y
Step 6: Secure MySQL Installation
sudo mysql_secure_installation
Step 7: Create MySQL User and Database
sudo mysql --user=root --password
> CREATE USER admin@localhost IDENTIFIED BY 'root';
> GRANT ALL PRIVILEGES ON *.* TO admin@localhost;
> FLUSH PRIVILEGES;
> EXIT;
Step 8: Install phpMyAdmin
sudo apt update
sudo apt install phpmyadmin -y
sudo ln -s /usr/share/phpmyadmin /var/www/html/phpmyadmin
Step 9: Upgrade phpMyAdmin
sudo mv /usr/share/phpmyadmin/ /usr/share/phpmyadmin.bak
sudo mkdir /usr/share/phpmyadmin/
cd /usr/share/phpmyadmin/
sudo wget https://www.phpmyadmin.net/downloads/phpMyAdmin-latest-all-languages.tar.gz
sudo tar xzf phpMyAdmin-*-all-languages.tar.gz
sudo mv phpMyAdmin-*-all-languages/* /usr/share/phpmyadmin
sudo cp /usr/share/phpmyadmin/config.sample.inc.php /usr/share/phpmyadmin/config.inc.php
sudo nano config.inc.php
Inside config.inc.php, set the blowfish secret:
$cfg['blowfish_secret'] = 'Zbwen/BEAFv:HTbqOROrqakJ;KUMIpV:';
Step 10: Configure File Permissions
ls -lh /var/www/
sudo chown -R pi:www-data /var/www/html/
sudo chmod -R 770 /var/www/html/
ls -lh /var/www/
Step 11: Upload Your Laravel Project
Use FileZilla or any FTP client to upload your Laravel project to /var/www/html/.
Step 12: Configure Apache for Laravel
sudo chown -R www-data:www-data /var/www/html/your-project-folder/storage
sudo chmod -R 775 /var/www/html/your-project-folder/storage
sudo a2enmod rewrite
sudo nano /etc/apache2/sites-available/000-default.conf
Edit the configuration as follows:
<pre class="wp-block-syntaxhighlighter-code"><VirtualHost *:80>
DocumentRoot /var/www/html/your-project-folder
<Directory /var/www/html/your-project-folder>
AllowOverride All
Require all granted
</Directory>
</VirtualHost>
Listen 81
<VirtualHost *:81>
DocumentRoot /var/www/html/phpmyadmin
<Directory /var/www/html/phpmyadmin>
AllowOverride All
Require all granted
</Directory>
</VirtualHost><br /><br /></pre>
sudo nano /etc/apache2/ports.conf
Listen 8080
Listen 8081
Step 13: Restart Apache
sudo service apache2 restart
Step 14: Final File Permissions
sudo chown -R pi:www-data /var/www/html/
sudo chmod -R 770 /var/www/html/
Step 15: Create a Database
Access phpMyAdmin at http://raspberrypi.local:81/ and create your database.
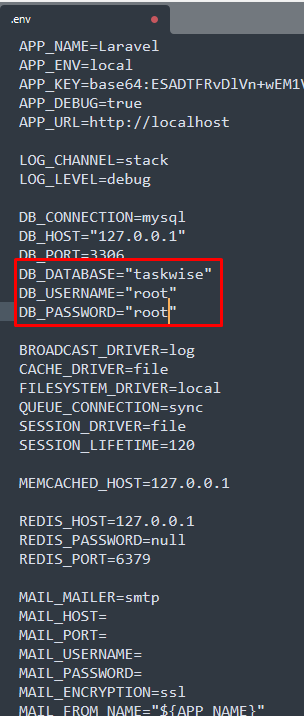
Step 16: Configure Laravel Environment
Update the .env file of your Laravel project with the database credentials.
Step 17: Follow Laravel Instructions
Refer to Laravel’s documentation and follow their instructions to complete your project setup.
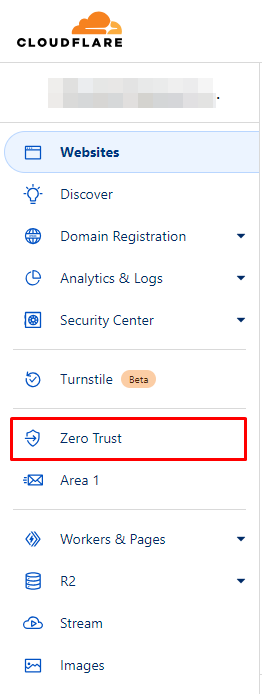
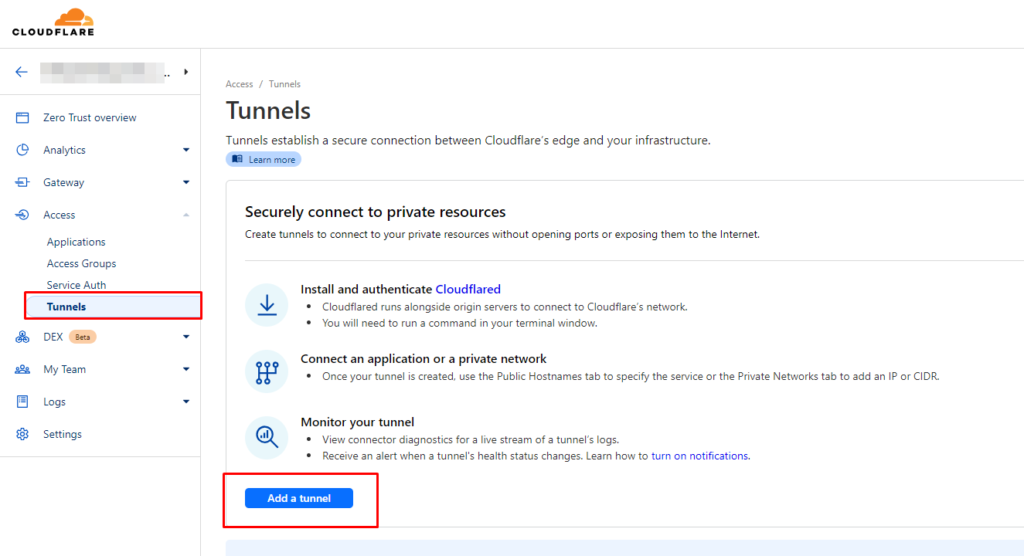
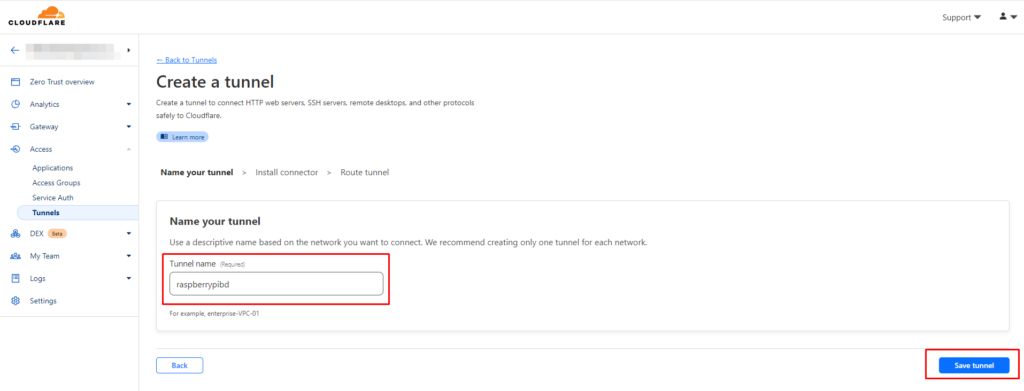
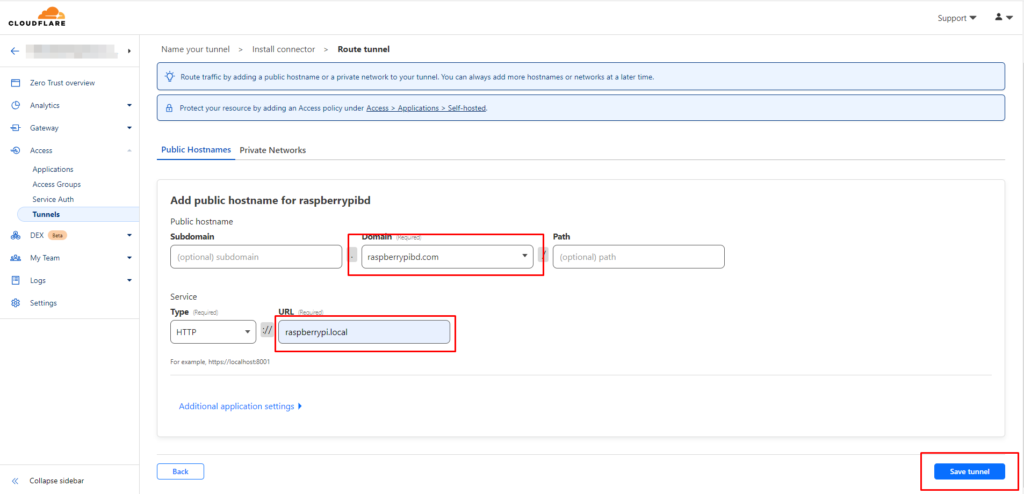
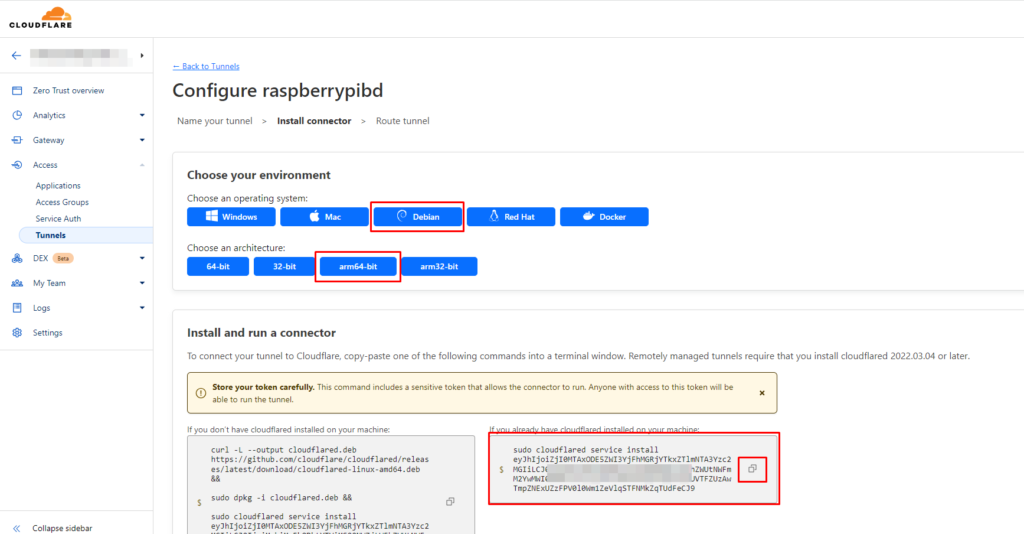
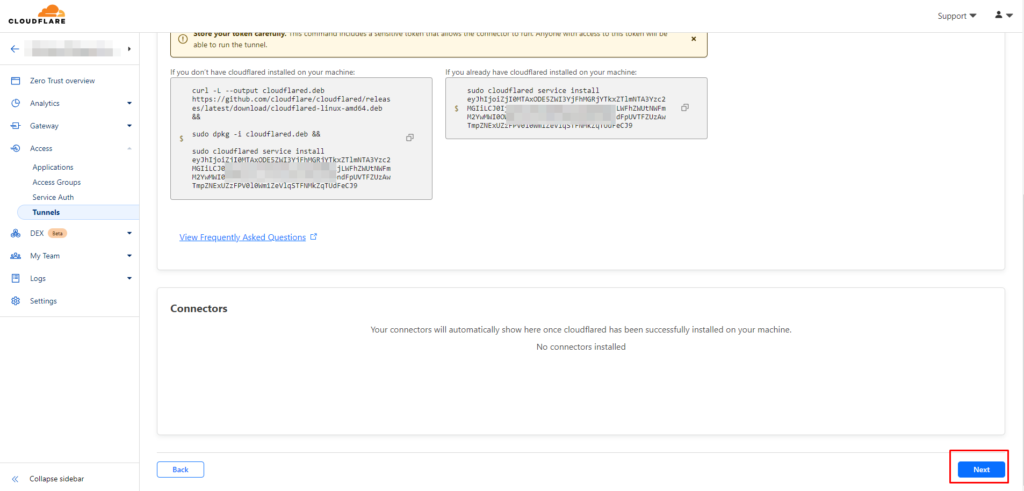
Step 18: Connect to Cloudflare Tunnel
Follow Cloudflare’s documentation to set up and connect your Raspberry Pi to Cloudflare Tunnel for secure remote access.
wget https://github.com/cloudflare/cloudflared/releases/latest/download/cloudflared-linux-arm sudo mv cloudflared-linux-arm /usr/local/bin/cloudflared sudo chmod +x /usr/local/bin/cloudflared
Conclusion:
You’ve successfully set up Apache, PHP, phpMyAdmin, and Laravel on your Raspberry Pi. Additionally, you’ve established a secure connection to your Pi using Cloudflare Tunnel, allowing you to access your web applications from anywhere with enhanced security.
